
It can be tricky to feel inspired in January after all the excitement of the holidays, but a little home uplift is always a trusty and effective solution to winter blues. There are many ways to revamp your space in line with the new year, but there’s nothing that a fresh lick of paint can’t fix as an easy DIY project for long winter weekends. Drew Michael Scott, also known as Lone Fox, knows best when it comes to painting. He renovated his entire Spanish-style home with beautiful DIY projects and documented the process on Instagram. Drew elevated his breakfast nook by covering the room in trendy stripes. He created a bold stripe pattern that still managed to make the nook feel calming and appropriate for starting your day. Amazingly, he accomplished the look with his trusty DIY method that uses only two materials – some paint and a roll of tape. Speaking to H&G, he shared his easy-to-replicate technique.
1. Begin with your primary color
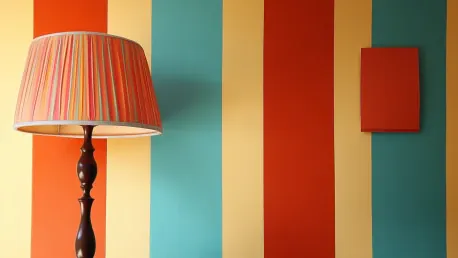
Decorating with stripes is a timeless style that can enhance a space and add some variation. They don’t need to be loud or bold; in fact, they can be subtle in color and feel elegant and sophisticated, blending into the backdrop of a room. Drew’s stripes are an example of the latter. He achieved the look by considering his primary color first, as this is just as important as the shade of the stripe. He says, “Start with your walls painted in the color you want to have as the base of your stripes. In my case, the base color in my breakfast nook was already painted the desired color – Dimity by Farrow and Ball.” When selecting your base color, it’s essential to choose a shade that complements the stripe color. This combination creates a harmonious and cohesive overall pattern. Remember to think of the primary shade and the stripe shade as a pair, as they’ll be working together to create an overall pattern that transforms the look and feel of your breakfast nook.
Once you’ve selected your primary color and painted your walls, let the paint fully dry before proceeding to the next step. This ensures that subsequent applications will adhere properly and prevents any mixing of colors. Drew’s approach involved carefully assessing the color balance in his room, ensuring that the base color was calming yet capable of showcasing the stripes elegantly. It’s this attention to detail that led to the cohesive and chic atmosphere he created. The selection of Dimity by Farrow and Ball as his base color exemplifies a considered choice that served as the perfect canvas for his stripes.
2. Apply your masking tape
To create a set of uniform stripes, Drew suggests using masking tape that can be stuck onto your walls and peeled off once the paint has been applied and dried. This step is crucial for achieving the precise and crisp lines that make the striped pattern stand out. “To create sharp lines for your stripes, I recommend using Scotch Blue Painters Tape. If you just painted the base color, I would use Scotch Delicate Tape, as it’s perfect for freshly painted walls.” Ensuring that the tape adheres well to the wall is vital for preventing paint bleed and achieving a clean look. Accurate application of tape can make a significant difference in the final appearance of your stripes.
Accuracy is key when creating your stripes, but don’t worry, Drew has a method to ensure neatness. He creates a template using tape and uses smaller pieces in the gaps to ensure each is the same size. “I used the tape itself as a spacer between lines by using small pieces of tape above each line to ensure the spacing was aligned when adding each additional stripe of tape.” By spacing the tape consistently, Drew ensured that each stripe looked uniform and professional. These small spacers between the lines help maintain equal distances, making it easier to keep a steady hand during the painting process. This careful attention to spacing contributes to the overall balance and symmetry of the stripe pattern, enhancing the aesthetic appeal of the breakfast nook.
3. Paint your stripes
Interestingly, Drew initially intended to “paint only a stripe or two in this space.” However, once he began the DIY process, he realized how much he loved the look and how much easier it was than he first expected, “so I went for it!” he says. “I covered the entire wall with diagonal stripes, and I love the way it turned out!” Drew recommends using a base coat over the first layer of paint to stop any unwanted smudging. Then he says to “Follow up with a layer (or two, depending on the color) of the color you want the stripes to be. Once it dries, you can peel it off to reveal the look.” Drew uses Oxford Stone by Farrow & Ball for his stripes. Always double-check the texture of your paint as removing the tape too soon could ruin your stripes’ uniformity.
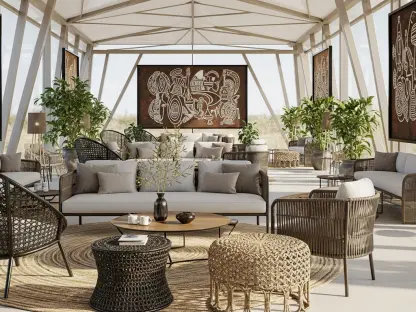
Drew’s use of muted colors is clever, as the subtle shades evoke peacefulness. Neutral shades make a great base for decorating as you can bring in any type of decor. Matching the style of the rest of his home, Drew decorated his nook with dark wood accents and antique pieces. Incorporating these elements not only complemented the stripe pattern but also infused his breakfast nook with character and warmth. The choice of muted colors helps maintain a serene atmosphere, making the space feel inviting and cozy without overwhelming the senses. This thoughtful approach to decorating ties the entire look together, resulting in a beautifully transformed space that combines elegance with comfort.
Drew’s Advice for Styling a Cozy Breakfast Nook
To achieve uniform stripes on your walls, Drew recommends using masking tape that can be applied and later removed, ensuring crisp, precise lines. “For sharp lines, use Scotch Blue Painters Tape,” Drew advises. “If you have just painted the base color, opt for Scotch Delicate Tape, which is ideal for freshly painted surfaces.” Proper adhesion of the tape is essential to prevent paint bleed and maintain a polished look. Accurate tape application significantly impacts the final appearance of your stripes.
Precision is essential when creating stripes, but don’t worry—Drew has a foolproof method to keep things neat. He uses tape to make a template, placing smaller pieces in the gaps to ensure uniform stripe sizes. “I use the tape itself as a spacer between lines, putting small pieces above each line to align the spacing for each additional stripe,” he explains. This consistent spacing technique ensures that each stripe looks professional and uniform. The small spacers help maintain equal distances, making it easier to paint steady lines. This attention to spacing enhances the balance and symmetry of the stripes, boosting the aesthetic appeal of the room.